
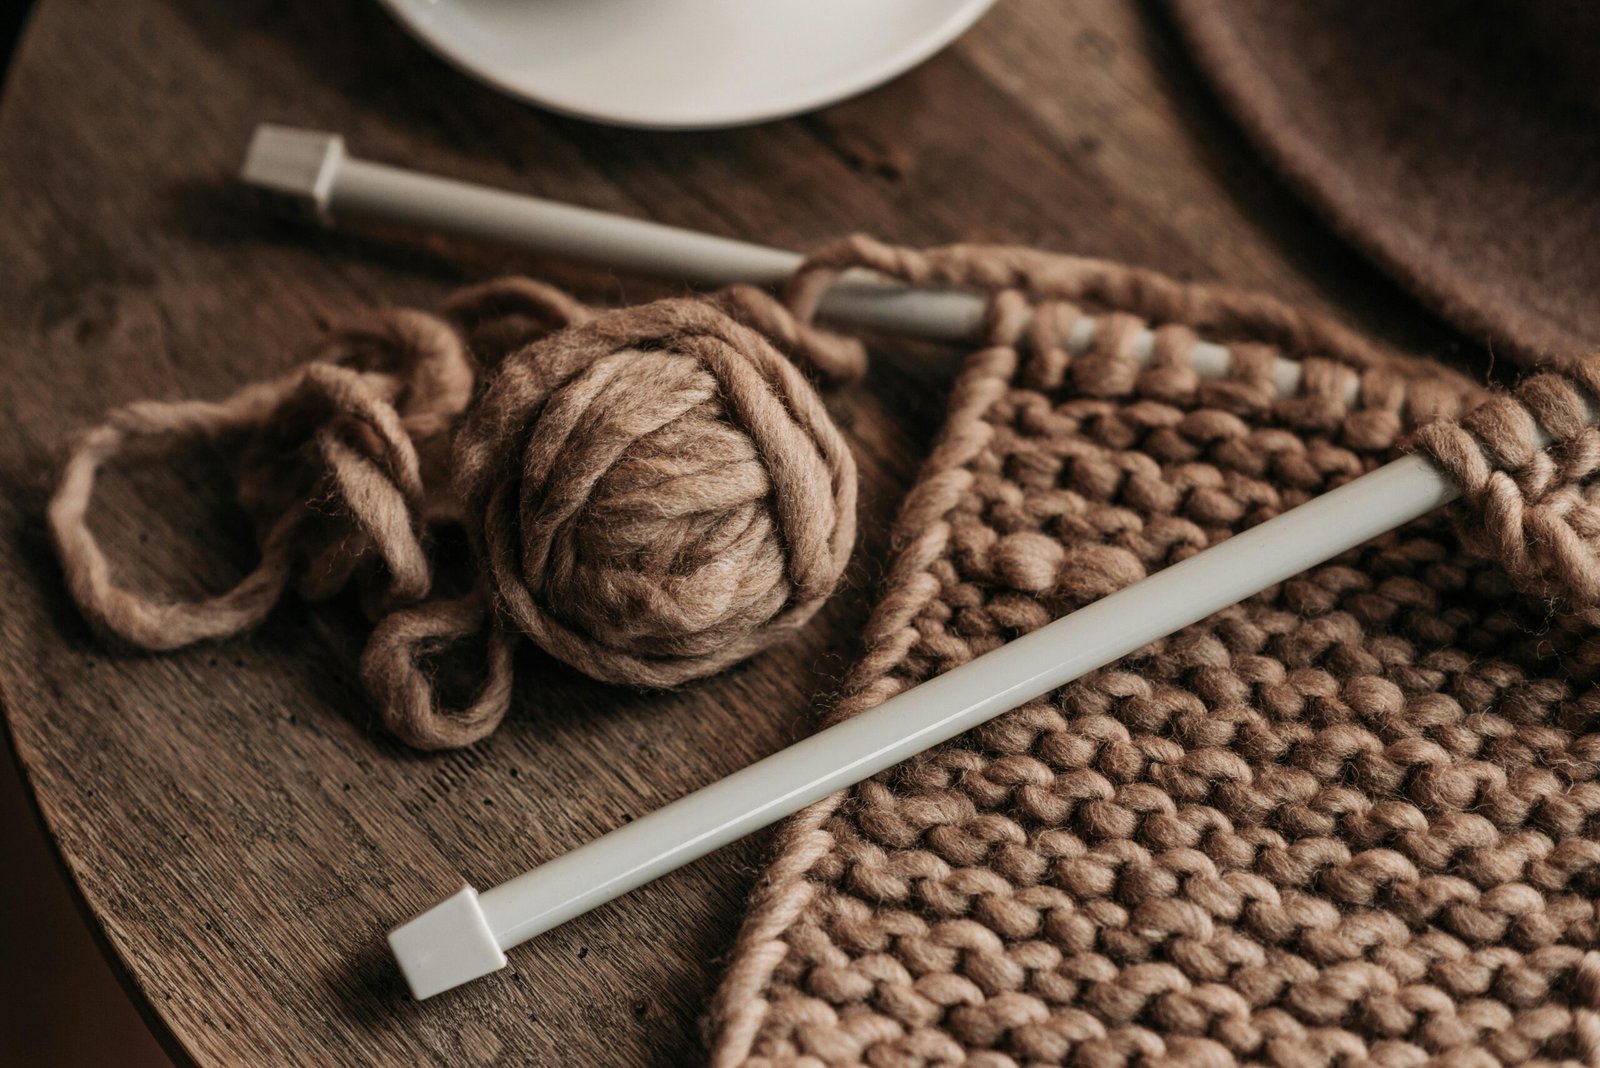
Crochet looks like magic when you first see it: a single hook, one strand of yarn, and suddenly there’s a scarf, a cute coaster, or a cozy beanie. The truth is less mysterious—and way more encouraging. Crochet is a skill built from a handful of simple movements that you repeat and combine. If you can learn how to hold the hook, make a slip knot, and pull yarn through loops, you can crochet.
This guide is designed for absolute beginners. It focuses on comfort, clarity, and results—so you don’t just “learn stitches,” you actually finish something you’re proud of.
What Crochet Really Is (and Why It’s Beginner-Friendly)
Crochet is a loop-based craft. You create loops with a hook, link them together, and build fabric one stitch at a time. Unlike knitting, crochet uses one active loop on the hook most of the time, which many beginners find easier to control.
It’s also flexible. If you make a mistake, you can pull back a few stitches and continue. No complicated setup. No huge equipment list. Just yarn, a hook, and a little practice.
The Simple Starter Kit You Actually Need
Beginners often get overwhelmed by “all the supplies.” You don’t need a big haul to start well.
Yarn: Choose the Easiest Type First
For learning, look for:
- Medium weight yarn (often labeled “worsted” or “#4”)
- Smooth texture (avoid fluffy, fuzzy, or eyelash yarn at first)
- Light or medium color (dark yarn hides stitches)
- 100% acrylic or a cotton/acrylic blend (easy to handle and affordable)
Avoid very thin yarn, super bulky yarn, or novelty textures until your hands understand the basics.
Hook: The Best Beginner Size
A great starting point is:
- 5.0 mm (H/8) or 5.5 mm (I/9)
These sizes pair well with worsted yarn and create stitches that are easy to see.
Extras That Make Life Easier
Optional but helpful:
- Stitch markers (or safety pins/paperclips)
- A yarn needle (for weaving in ends)
- Small scissors (use carefully and store safely)
- Measuring tape (nice for projects, not required)
That’s it. If you have yarn + a hook, you can begin today.
How to Hold Your Hook and Yarn Without Feeling Awkward
There’s no single “correct” way. Your goal is control without tension.
Two Common Hook Grips
- Pencil grip: like holding a pencil, good for precise movements.
- Knife grip: like holding a table knife, good for stability.
Try both for five minutes each. Keep what feels natural.
Yarn Tension: The Beginner Sweet Spot
Tension just means how tightly you hold the yarn. Too tight and you’ll struggle to insert your hook. Too loose and your stitches look messy.
A helpful trick:
- Let the yarn run over your index finger.
- Wrap once around a finger or two for gentle friction.
- Keep your hand relaxed.
If your hand cramps, your tension is probably too tight. Shake your hands out, take breaks, and loosen up.
The Three Core Moves That Power Most Crochet
Crochet stitches are basically combinations of:
- Yarn over (wrap yarn over the hook)
- Pull through (pull yarn through a loop)
- Insert hook (place hook into a stitch or chain)
If you practice these slowly, everything else becomes easier.
Your First Skills: Slip Knot and Chain
Step 1: Make a Slip Knot
A slip knot is the adjustable loop that starts your project.
Basic method:
- Make a loop with the yarn.
- Pull a new loop through it.
- Tighten gently around the hook (snug, not strangling).
Step 2: Chain Stitch (ch)
Chains are the foundation of many projects.
How to chain:
- Yarn over
- Pull through the loop on your hook
- Repeat
Beginner tip: count your chains as you go. Many beginners accidentally add extra chains or forget to count.
Understanding Rows, Stitches, and “Where Do I Put the Hook?”
This is the part that confuses nearly everyone at first, so here’s the simple explanation.
- The chain creates a line of “V” shapes.
- When you crochet into the chain, you create your first row.
- After each row, you make a small turning action to crochet back across.
Where to Insert the Hook in a Chain
For beginners, an easy method is to insert under the top two loops of the chain (the front “V”). Some patterns use different methods, but this is a great starting point.
If you struggle to insert the hook, your chain is too tight. Try:
- Using a slightly larger hook just for the chain
- Consciously loosening the chain stitches
- Practicing 20 chains a day for a few days
Learn These 4 Beginner Stitches First
You do not need 20 stitches to start. These four cover a huge amount of beginner projects.
1) Single Crochet (sc)
Single crochet makes a firm, dense fabric—great for coasters, dishcloths, and amigurumi practice.
Steps:
- Insert hook into stitch
- Yarn over, pull up a loop (2 loops on hook)
- Yarn over, pull through both loops
2) Half Double Crochet (hdc)
A little taller than single crochet, softer drape, still easy to control.
Steps:
- Yarn over, insert hook into stitch
- Yarn over, pull up a loop (3 loops)
- Yarn over, pull through all 3 loops
3) Double Crochet (dc)
A very common stitch for scarves and blankets.
Steps:
- Yarn over, insert hook
- Yarn over, pull up loop (3 loops)
- Yarn over, pull through 2 loops (2 loops remain)
- Yarn over, pull through 2 loops
4) Slip Stitch (sl st)
Used to join rounds and move yarn without adding height.
Steps:
- Insert hook
- Yarn over, pull through stitch and loop on hook in one motion
Counting Stitches: The Secret to Straight Edges
If your project gets wider or narrower, it’s usually because you’re adding or missing stitches at the ends.
How to Count
Count the “V” shapes along the top edge of your row. Each V is a stitch.
Mark the First and Last Stitch
Use stitch markers (or a paperclip) on:
- The first stitch of a row
- The last stitch of a row
This tiny habit saves hours of confusion.
A Realistic Practice Plan That Actually Works
Instead of trying to learn everything in one sitting, follow a simple progression:
Day 1–2: Chains + Single Crochet
- Make 30 chains
- Crochet single crochet across
- Repeat for 10–15 minutes
Day 3–4: Half Double Crochet
- Practice hdc rows
- Focus on consistent stitch height
Day 5–6: Double Crochet
- Practice dc rows
- Learn to recognize stitches at the row end
Day 7: Choose a Small Finishable Project
You’ll learn faster when you have a goal you can complete.
Your First Finished Project: A Simple Crochet Coaster
This is a perfect first project because it’s small, useful, and forgiving. You’ll practice chains, single crochet, turning, counting, and finishing.
Materials
- Worsted weight yarn (cotton is great for coasters)
- 5.0 mm hook
- Scissors
- Yarn needle
- Stitch marker (optional)
Size Goal
A beginner coaster can be about 4 inches / 10 cm square. Don’t stress exact measurements—your first one is about learning.
Pattern: Single Crochet Square Coaster
- Chain 16
This usually makes a coaster about 4 inches wide in single crochet, depending on tension. - Row 1: Single crochet into the second chain from the hook, then single crochet in each chain across.
You should have 15 single crochet stitches. - Chain 1, turn.
- Row 2: Single crochet in each stitch across (15 stitches).
Chain 1, turn. - Repeat Row 2 until the piece looks square (often 14–18 rows depending on tension).
- Fasten off (cut yarn, pull tail through loop).
- Weave in ends with a yarn needle.
Weave in through several stitches, change direction, and weave back to lock it in.
Beginner Checks
- Are the sides mostly straight?
If not, recount stitches. You might be skipping the last stitch or adding one. - Is the coaster curling?
Curling can happen if tension is tight. Blocking or relaxing tension usually helps.
How to Fix Common Beginner Problems (Without Stress)
“My stitches are too tight.”
This is extremely common.
- Try a larger hook
- Relax your grip
- Practice slower
- Focus on making the loop on your hook a bit taller before pulling through
“I can’t find the first stitch of the row.”
Use a stitch marker in the first stitch every time. Remove it when you reach it on the next row and place it again.
“My edges look bumpy.”
That’s normal. Edge neatness improves quickly with practice and counting.
“My piece is getting wider.”
You may be adding stitches at the end. Count each row.
“My piece is getting narrower.”
You may be missing the last stitch. The last stitch can hide—especially in single crochet.
Finishing Skills: Fastening Off and Weaving In Ends
Finishing is what makes your crochet look clean and last longer.
Fasten Off
- Cut yarn leaving a tail (about 6 inches / 15 cm)
- Yarn over and pull the tail through the last loop completely
Weave In Ends
Use a yarn needle to weave the tail through stitches:
- Go one direction for several stitches
- Change direction
- Go back a few stitches
This locks the yarn in place better than weaving in a straight line.
What to Make Next (Easy Projects That Build Skills)
Once you finish a coaster, you’ve unlocked a bunch of beginner projects:
- Simple dishcloth (cotton yarn, single crochet or half double crochet)
- Headband/ear warmer (half double crochet rectangle + seam)
- Basic scarf (double crochet rows)
- Granny square (a classic, great for learning corners and rounds)
Choose something small first so you finish it and stay motivated.
How to Stay Motivated When You Feel “Bad at It”
Here’s a truth: everyone’s first crochet looks a little weird. Crochet is muscle memory. Your hands are learning new movements, and that takes time.
A good goal is not perfection. It’s progress:
- Can you make even chains?
- Can you crochet a row without losing count?
- Can you finish a small square?
If yes, you’re doing it.
Wrap-Up: Your “First Week Crochet Wins” Checklist
By the end of your first week, aim for:
- A comfortable grip
- A chain you can crochet into
- Single crochet rows with consistent stitch count
- One finished coaster with woven-in ends
If you’ve reached that, you’re officially crocheting—not “trying to learn crochet.” The next projects will feel easier, and the craft becomes more fun every day.
Knitting for Beginners: The Easiest Path to Your First Scarf
Knitting has a cozy reputation for a reason. There’s something calming about turning yarn into fabric with two needles. But the beginning can feel confusing: stitches slip off, tension looks uneven, and everything seems slower than you expected.
Here’s the good news: you only need a few basics to knit confidently. With the right yarn, the right needles, and a beginner-friendly plan, you can go from “what is this?” to finishing your first scarf.
This article walks you through knitting in a clear, practical way—no complicated jargon, no overwhelming options, and plenty of tips to avoid the most common beginner frustrations.
What Knitting Actually Is (In Plain Language)
Knitting is the art of creating fabric by forming loops (stitches) and transferring them between two needles. Each row builds on the row before it.
The biggest beginner shift is understanding that stitches live on the needle. Your job is to move them across while forming new loops in a consistent rhythm.
Once you learn:
- how to cast on (get stitches onto the needle),
- how to knit stitch (the most basic stitch),
- and how to bind off (finish the edge),
you can make a scarf, a headband, a dishcloth, and a surprising number of other projects.
The Beginner Knitting Kit That Works Every Time
Yarn: Pick “Easy Mode”
Start with:
- Worsted weight yarn (#4)
- Smooth texture (avoid fuzzy yarn at first)
- Light or medium color (dark hides stitch definition)
- Acrylic or wool-acrylic blend (soft, affordable, forgiving)
Avoid:
- super thin yarn (hard to see stitches)
- slippery yarn (hard to control)
- novelty textures (hard to learn with)
Needles: The Best Beginner Choice
For most beginners:
- US 8 (5 mm) or US 9 (5.5 mm) straight needles are excellent.
Bamboo or wood needles can be easier than metal because stitches slip less.
Extras
Helpful but optional:
- Stitch markers
- Tapestry needle for weaving in ends
- Measuring tape
- Small scissors (handle safely and store properly)
Two Basic Styles: English vs Continental
Different people hold yarn differently. Both are valid.
English Style (Throwing)
- Yarn held in the right hand
- You “wrap” the yarn around the needle
Continental Style (Picking)
- Yarn held in the left hand
- You “pick” the yarn with the needle
Try both and keep what feels easiest. Comfort is more important than copying someone else’s method.
The Knit Stitch: Your First Building Block
The knit stitch is the foundation of many beginner projects.
A simple way to describe it:
- Insert needle
- Wrap yarn
- Pull loop through
- Slide old stitch off
If you repeat knit stitches on every row, you create garter stitch—a bouncy, textured fabric that lies flatter than many other stitch patterns. That’s why garter stitch is perfect for a first scarf.
Casting On: Getting Stitches Onto the Needle
Casting on is the setup step where you create the first row of loops.
For beginners, the long-tail cast on is popular but can feel tricky at first. Another beginner-friendly option is the knitted cast on, which uses the knit stitch itself—slower, but easier to understand.
Knitted Cast On (Beginner-Friendly)
- Make a slip knot and place it on the left needle.
- Insert right needle into the stitch as if to knit.
- Wrap yarn and pull a new loop through.
- Place that new loop onto the left needle (this becomes a new stitch).
- Repeat until you have the number of stitches you need.
It’s not the fastest cast on, but it teaches you how stitches form.
Tension: The Skill That Improves With Time
Beginner tension often swings between too tight and too loose. That’s normal.
If your stitches are too tight:
- Relax your hands
- Try a slightly larger needle
- Don’t pull the yarn after every stitch
- Let the needles do the work
If your stitches are too loose:
- Hold yarn with a bit more control
- Keep the yarn path consistent across your fingers
- Slow down and focus on even loops
Your tension will naturally improve after a few sessions.
How to Avoid Dropped Stitches
A dropped stitch is when a loop slips off the needle unintentionally. It’s annoying, but fixable.
To prevent it:
- Keep an eye on your stitch count
- Don’t knit too close to the needle tip
- If you pause, make sure stitches are safely on the thicker part of the needle
If you do drop a stitch, don’t panic. Beginners can often “ladder” it back up using a crochet hook or the needle tip. Even if you can’t fix it perfectly, you can learn from it and keep going.
Your First Project: A Simple Garter Stitch Scarf
This scarf is designed to be:
- easy to memorize,
- hard to mess up,
- and great practice for consistency.
Materials
- Worsted weight yarn (about 200–300g depending on desired length/thickness)
- US 8 (5 mm) needles
- Tapestry needle
- Scissors
Scarf Width
A beginner scarf can be:
- 20–30 stitches wide for a classic scarf
- 15–20 stitches wide for a slimmer scarf
If you want your stitches bigger and faster, use a slightly thicker needle and yarn.
Pattern: Garter Stitch Scarf
- Cast on 24 stitches (a great middle-ground width).
- Row 1: Knit every stitch across.
- Turn the work.
- Row 2: Knit every stitch across.
- Repeat Row 2 until the scarf reaches your preferred length.
- Bind off (finish edge).
- Weave in ends.
That’s it: knit every row.
How to Bind Off Without Tightening the Edge
A common beginner mistake is binding off too tightly, which makes the scarf edge shrink or look stiff.
Basic bind off method:
- Knit two stitches.
- Use the left needle to lift the first stitch over the second stitch and off the needle.
- Knit one stitch.
- Lift the previous stitch over it.
- Repeat until one stitch remains.
- Cut yarn and pull through last stitch.
To keep it loose:
- Bind off with a slightly bigger needle, or
- Make a conscious effort not to pull the yarn tight after each bind-off step.
Make Your Scarf Look Better Fast: 6 Simple Tips
1) Use a Light Yarn Color
You’ll see stitches better, and the fabric looks more even.
2) Count Every Few Rows
Not because you must—because it prevents surprises.
3) Keep Edges Neater With a Simple Habit
Try this edge trick:
- Slip the first stitch of every row (instead of knitting it), and knit the rest.
This can create a cleaner “chain-like” edge.
If you do this, do it consistently every row.
4) Practice “Even Speed,” Not “Fast Speed”
Speed comes after your hands learn the motion.
5) Fix Mistakes Early
If you notice something off, undo a few stitches now rather than hoping it disappears later.
6) Take Breaks
Hand cramps mean it’s time to pause. Stretch your fingers, rotate wrists gently, and continue later.
Understanding What You’re Seeing: Reading Your Knitting
Learning to “read” knitting helps you catch errors.
In garter stitch:
- Each row looks like small ridges.
- The fabric is thick and squishy.
- It doesn’t curl much.
If you accidentally purl a whole row, you’ll get a change in texture. That’s not a disaster. It’s just a sign your scarf has “character”—or a reminder to slow down.
Common Beginner Problems and How to Fix Them
“My scarf is getting wider.”
You might be accidentally creating extra stitches.
This often happens if you knit into the yarn between stitches or mistake the edge loop.
Fix:
- Count stitches every 5–10 rows.
- Learn what the edge stitch looks like.
“My scarf is getting narrower.”
You may be dropping stitches at the ends.
Fix:
- Make sure you knit the last stitch of each row.
- Don’t let the last stitch slip off when turning.
“My stitches look uneven.”
This improves with repetition.
Also, different yarns show unevenness more.
Fix:
- Keep practicing.
- Consider blocking lightly at the end (optional).
- Accept that first projects are learning projects.
Taking Care of Your Finished Scarf
To keep your scarf looking good:
- Follow yarn label washing instructions.
- Acrylic is usually easy-care.
- Wool may need gentle hand washing.
- Dry flat if possible to keep shape.
Weaving in ends securely matters, especially for scarves that get pulled and wrapped often.
What to Learn Next After You Finish the Scarf
Once you can knit a garter stitch scarf, your next skills might be:
- Purl stitch (unlocks stockinette and ribbing)
- Ribbing (great for hats and cuffs)
- Simple increases/decreases
- Knitting in the round (circular needles for hats)
But don’t rush. Finishing projects is how you build confidence.
Wrap-Up: Your Beginner Knitting Milestones
If you can:
- cast on without stress,
- knit a row without losing stitches,
- bind off without tightening,
- and finish a scarf you can wear,
you’ve done something real. You’re not “learning to knit.” You’re knitting.

Isabella Garcia is the creator of a blog dedicated to crafts and home care, focused on making everyday life more creative, organized, and enjoyable. The blog shares practical tips, easy DIY projects, home organization ideas, and simple solutions to take better care of your living space. Whether you’re a beginner in crafting or someone looking for inspiration to improve your home routine, Isabella’s blog offers clear, useful, and hands-on content to help you create a cozy, beautiful, and well-cared-for home.